Some of the experiences in Apple Vision Pro are pretty thrilling, and you’re going to want to share them with others. Unfortunately, there’s no way to actually capture the experience of a VR environment for those who aren’t also in VR–it’s like using a black and white TV to show someone how cool color TVs are.
But you can still take screenshots and record videos of what you see, with a few caveats. And it’s pretty easy; if you’ve used to doing so on an iPhone, you’ll feel right at home on Vision Pro.
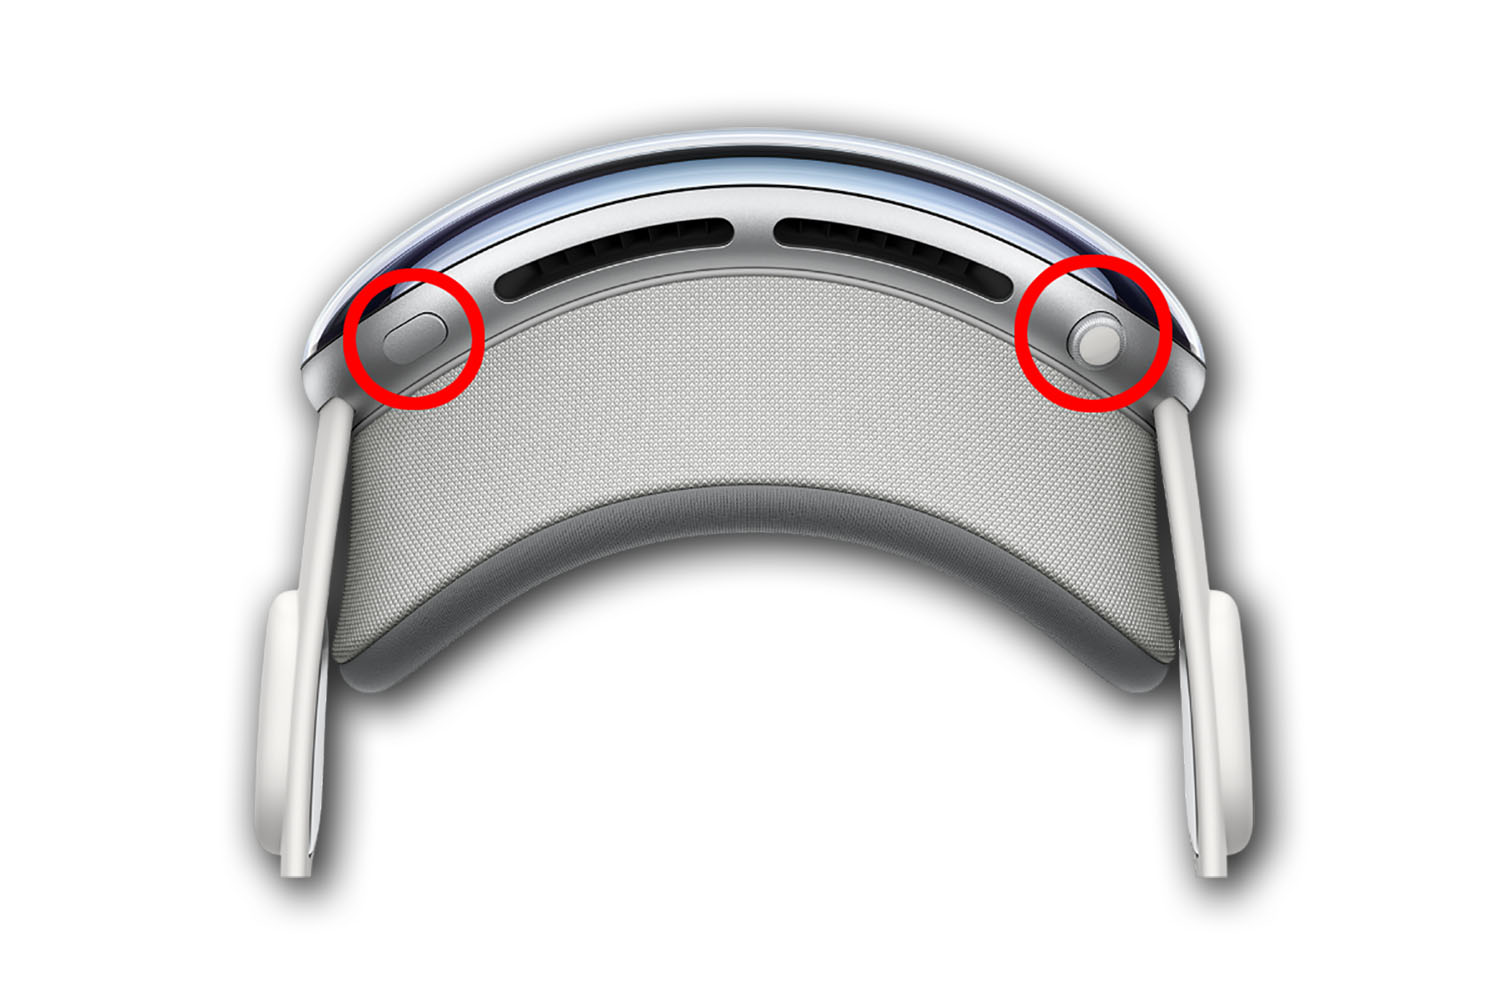
To record screenshots, do one of the following:
- Press the Digital Crown and Top Button at the same time.
- Say “Siri, take a screenshot.”
The screenshot will go to your Photos library in the Screenshots section.
Apple
Sometimes you need video to convey what you want, and that’s especially true on Vision Pro. That takes a little more effort but it’s still pretty simple.
- Open Control Center (look up at the top of your view and select the little button that appears).
- Select the controls buttons (it looks like two horizontal switches).
- Select the view record button. If you don’t see it, add it in Settings > Control Center.
- Top stop recording, select the red status bar at the top of your view or the record button again, and select Stop.
As of visionOS 1.1, screenshots and recordings will unfortunately be limited to a resolution of 1920×1080, which makes them look much lower-resolution than the view inside the headset. Perhaps Apple will increase the resolution of captures in the future, as developers can take higher-quality captures using the development tools.
Some video content has content protection that causes the video view to appear black when recording, and your view will be obscured when entering a password or passcode.
Source : Macworld


