With macOS Sequoia, Apple is introducing a new feature that lets you arrange windows in side-by-side tiles. It’s a new—and somewhat overdue— organizational feature to help users sort open windows and quickly find the one that’s needed.
Not only is the new window tiling feature welcomed but it should’ve been in macOS long ago. Having multiple windows open is core to the Mac experience–as I write this, I have five different app windows open at the same time (it’s usually more than that) in a disorganized mess. I use Command+Tab to switch between them, but a lot of users have already installed a third-party utility to fill the tiling void that Apple didn’t bother to fill until now.
If you currently use a third-party window tiling tool such as BetterSnapTool, Lasso, Magnet, Moom, Rectangle, or something else (there are many of them!), don’t think that Sequoia will render it useless. In fact, with the way that Apple implements tiling–what was shown during the WWDC24 keynote is pretty much what you get–you’ll likely find that you’ll continue to use the third-party tool of your choice.
Also, for a lot of users, Sequoia’s windows tiling will be an introduction to tiling management. After spending some time with it, you may like tiling but not the way Sequoia does it, or you want it to do more. That’s where a third-party app can step in.
WIndow tiling in macOS Sequoia is a much-needed feature, but it won’t be as robust as a third-party utility.
Apple
There are a few reasons why you might still want to opt for a third-party window-tiling utility, all of which bring features you won’t find with macOS Sequoia’s method. Most of the apps are available for $10 or less (some are even free), and some have free trial versions available.
Layout variations
Like macOS Sequoia, third-party tiling apps all offer standard two-, three- and four-windows layouts. But with some third-party tools, you get the ability to customize layouts and use non-standard layouts, such as three windows that each take up a third of the screen instead of the usual one window in half and the other two each in a quarter. That’s useful if you have a main window where you’re doing most of your work and supplemental windows with supporting apps.
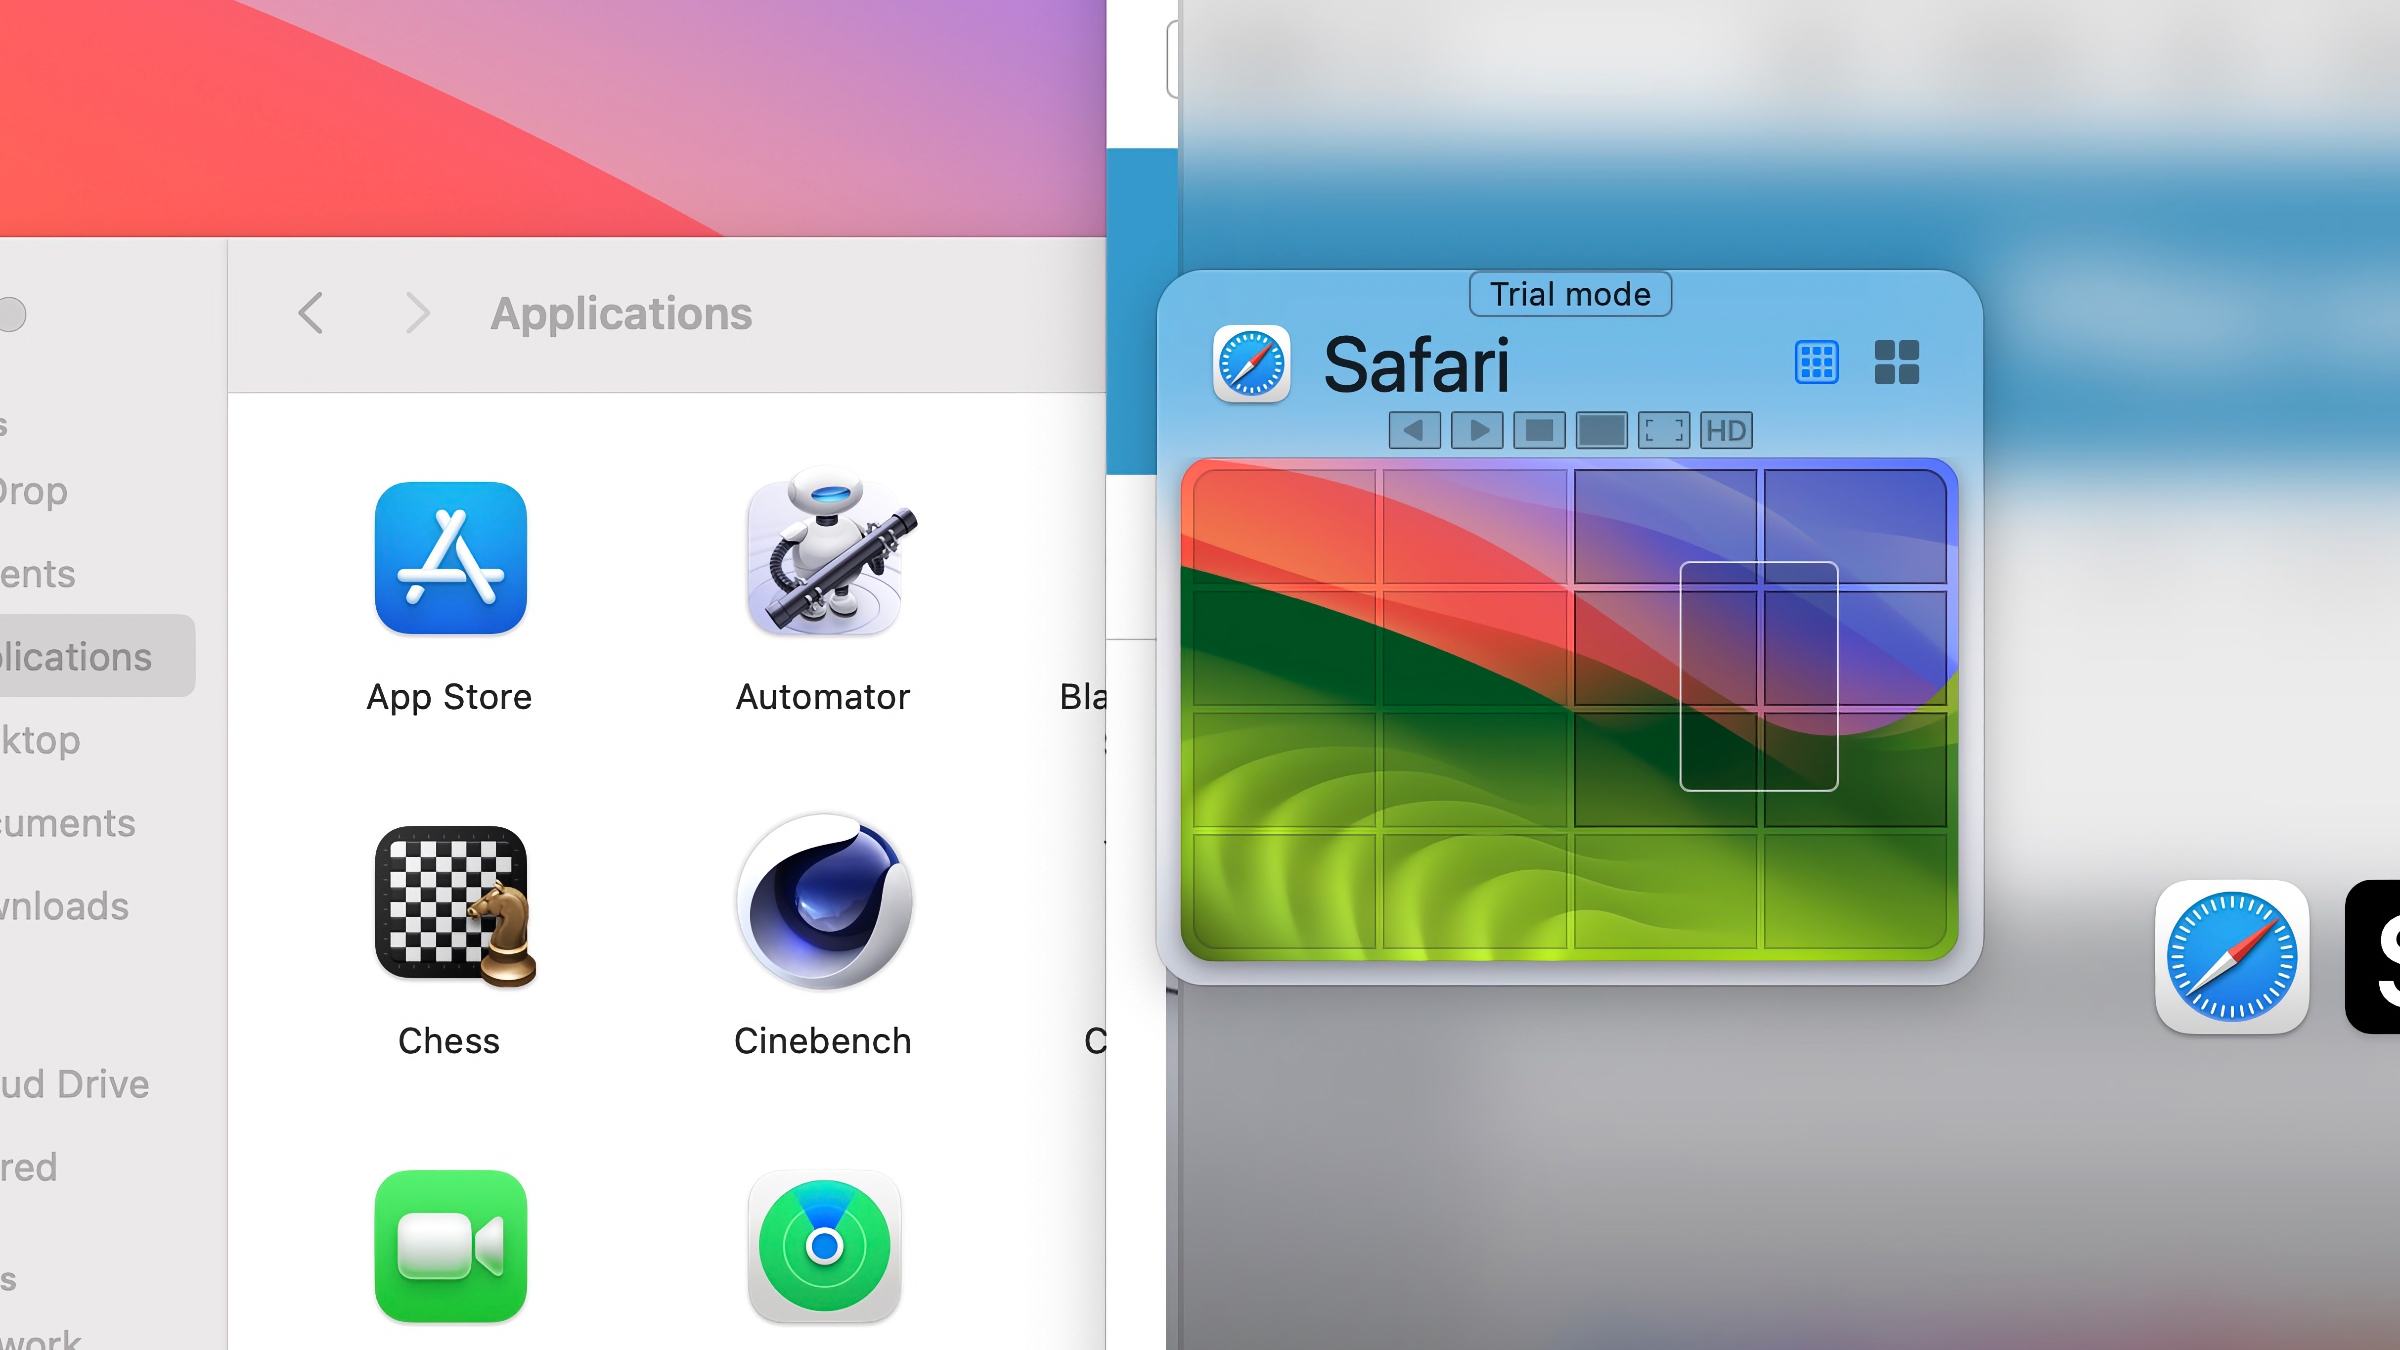
With Lasso, you can define how you want the window to be placed by selecting sections of a grid.
Foundry
To use macOS Sequoia window tiling, you can click and drag a window to the edge of the screen, which will position the window. You can also hover over the green window control button in the upper left corner to see the tiling options.
It appears easy enough to use, but third-party apps offer more versatility. For example, some let you drag a window into an area and it snaps into place. Others work with a keyboard combination that brings up a little grid window of your desktop where you can select the area where you want the window to be placed. There’s a lot more placement flexibility with a third-party app.
Saved layouts
Some third-party apps allow you to create a layout and save it. This can be useful if, for example, you have an external display that you use as a “control board” that has apps you always want open, such as email, Messages, Slack, Calendar, Weather, etc. This isn’t available in macOS Sequoia at the moment but could be added sometime during the beta-testing process.
Keyboard commands
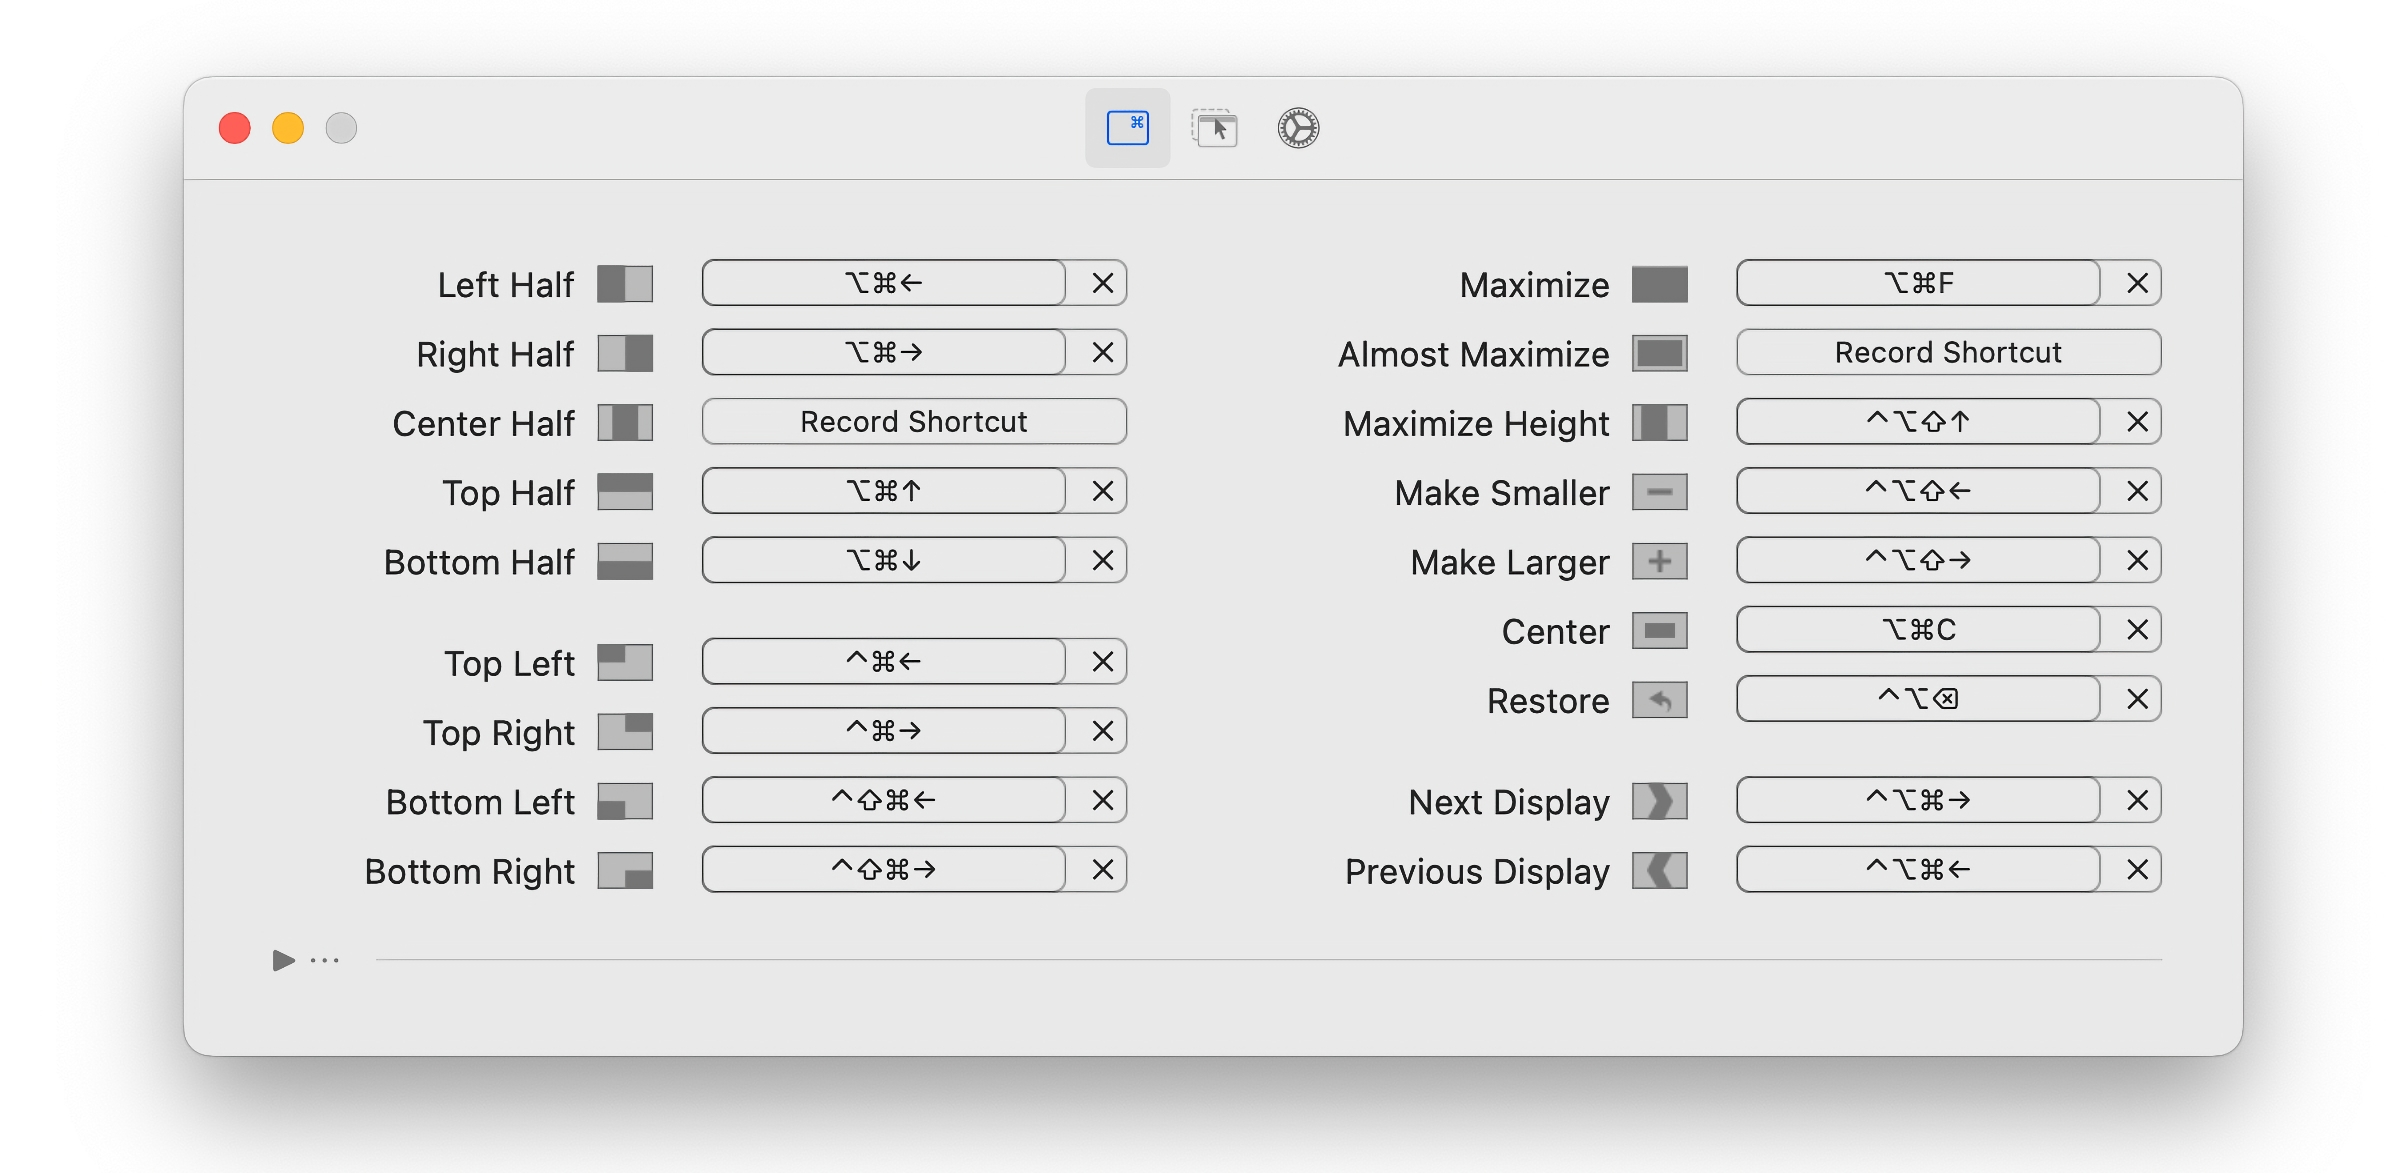
During the keynote, Craig Federighi said that tiling will support keyboard shortcuts. But don’t expect those shortcuts to offer more than the most basic of tools. Many third-party tools offer keyboard shortcuts, too, but they offer more functionality or the ability to create custom commands.
Rectangle offers more functionality than macOS Sequoia’s window tiling–offering keyboard shortcuts for most of these functions.
Ryan Hanson
Beyond the basics that macOS Sequoia offers
macOS Sequoia’s window tiling is a welcome addition to multitasking on the Mac, but it’s not going to blow you away with features. If you want a little more from tiling, you’ll need to turn to a third-party app. Fortunately, there are a lot of good ones and they’re all affordable–most offer a one-time purchase fee with the need for a subscription.
Learn more about the next Mac operating system in our macOS Sequoia superguide.
Source : Macworld


