

Some Mac users report that their Mac or MacBook cannot read the inserted disk with the error code: “The disk you attached was not readable by this computer.”
This issue often occurs on Macs and indicates disk errors. You can try to fix this problem by restarting the Mac. If the disk is still not readable after a fresh reboot, keep reading, and we’ll guide you through four possible solutions.
Before troubleshooting, back up your disk to avoid unnecessary data loss. Try EaseUS Data Recovery Wizard for Mac; this all-in-one tool will help you recover data from hard disks and back up storage devices immediately.
What causes ‘The disk you attached was not readable by this computer’ on Mac
This error message usually appears when your computer cannot access an external hard drive, SD card, or USB drive.
Here are some typical reasons for this error:
- Unsupported file system. If you have formatted the external hard disk to be only readable on Windows, your Mac may not be able to access it.
- Corrupted file system. A Mac cannot read your disk, which may be because the storage device’s file system is corrupted.
- Viruses affect. If your disk was attached by computer viruses and malware, that may lead to the disk not being recognized.
- Corrupted disk. Bad errors or other physical damages can cause disks to become unreadable on computers.
- Uninitialized disk.
- MacOS system bugs. Outdated OS or recent bugs can cause this error.
- Broken cables or ports. If the USB-C or Thunderbolt cables are broken, your Mac may be unable to access the disk successfully.
No matter what situation causes the attached disk to not be read on a Mac, you should back up the disk first and prepare reliable hard drive recovery software, like the EaseUS data recovery tool, if you need to format the drive on a Mac.
Fix 1. Check physical connections to troubleshoot your not readable disk
The first and easiest way to troubleshoot disk unreadable on Mac is by checking the physical connections. When you encounter “The disk you attached was not readable by this computer”, try the following methods first:
- Reconnect the disk to a Mac or MacBook after cleaning the connectors if they appear dirty.
- Connect the faulty drive to a different Mac or Windows PC to check if it is recognized.
- Connect the unreadable disk to a different USB port on your Mac.
- Ensure the cable is correct and undamaged; if not, change to a suitable one.
After ensuring the physical connection is stable and the Mac cannot read the disk, move to the next solution.
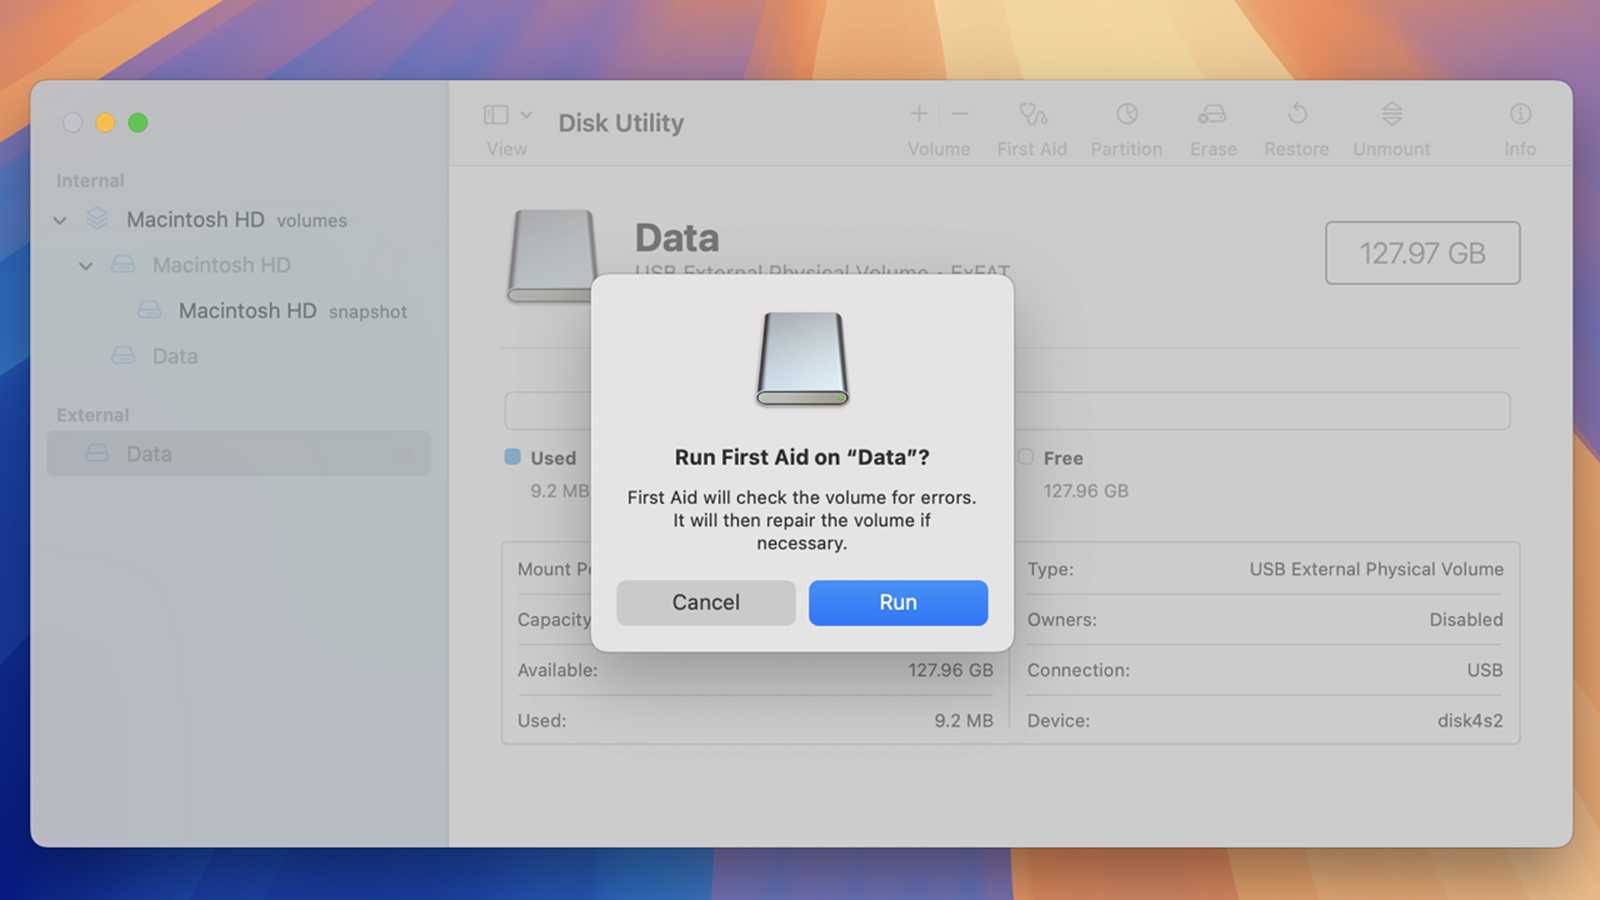
Fix 2. Run First Aid to fix the disk not being readable
First Aid for Mac is a built-in disk error diagnosis tool. This disk repair utility can help Mac users quickly solve unexpected disk errors and diagnose problems on internal hard disks and external hard drives, USB flash drives, or SD cards.
Here’s how to apply First Aid in Disk Utility to repair the inserted unreadable disk.
Step 1. The easiest way to access Disk Utility on a Mac is to open Spotlight. Press the Command and Space keys together, select Disk Utility, and press Enter.
Step 2. Select the problematic disk and choose First Aid, then click Run in the pop-up window. It can fix common errors on SanDisk, Samsung, WD, and Seagate hard disks.
EaseUS
EaseUS
EaseUS
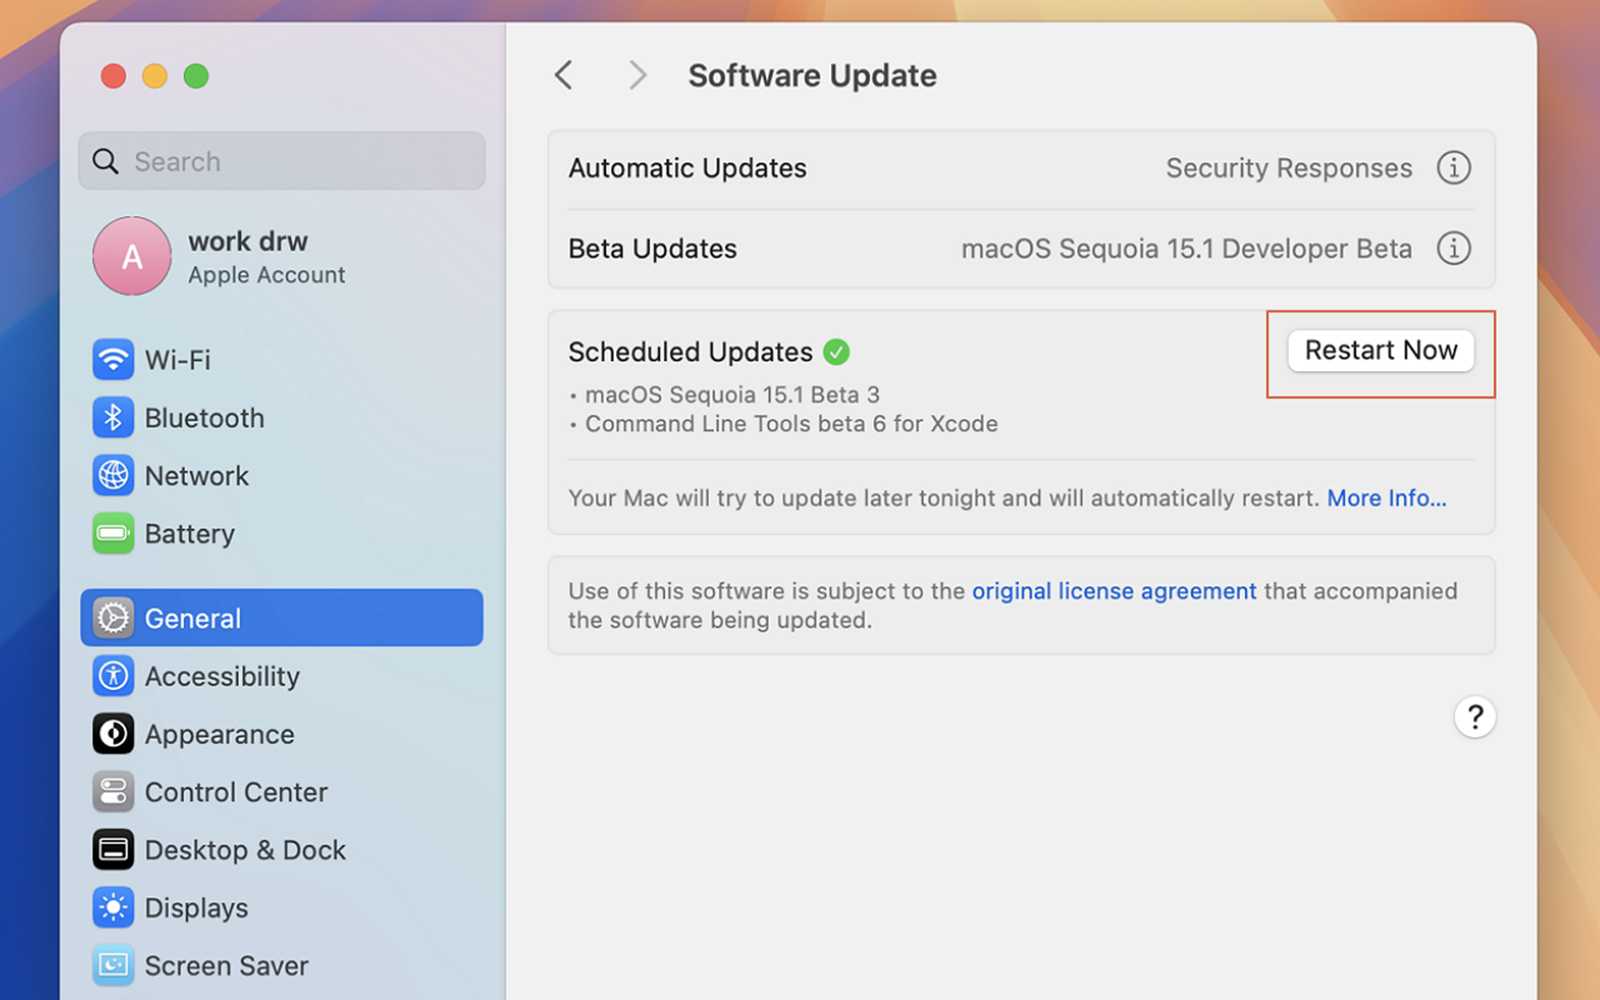
Fix 3. Update the disk driver to fix the unreadable issue
An out-of-date disk driver on a Mac can cause potential issues, such as inaccessibility, inability to write data on the disk, or other disk error codes.
You can update the driver individually on Windows, but you cannot do the same on Mac. You should update macOS to fix the disk drive and the unreadable problem.
Here’s how to update macOS on a Mac:
Step 1. Click the Apple menu and choose System Settings.
Step 2. In the window that pops up, scroll down and choose Software Update.
Step 3. Your Mac will begin finding available updates. When prompted, click Restart now to update your Mac.
EaseUS
EaseUS
EaseUS
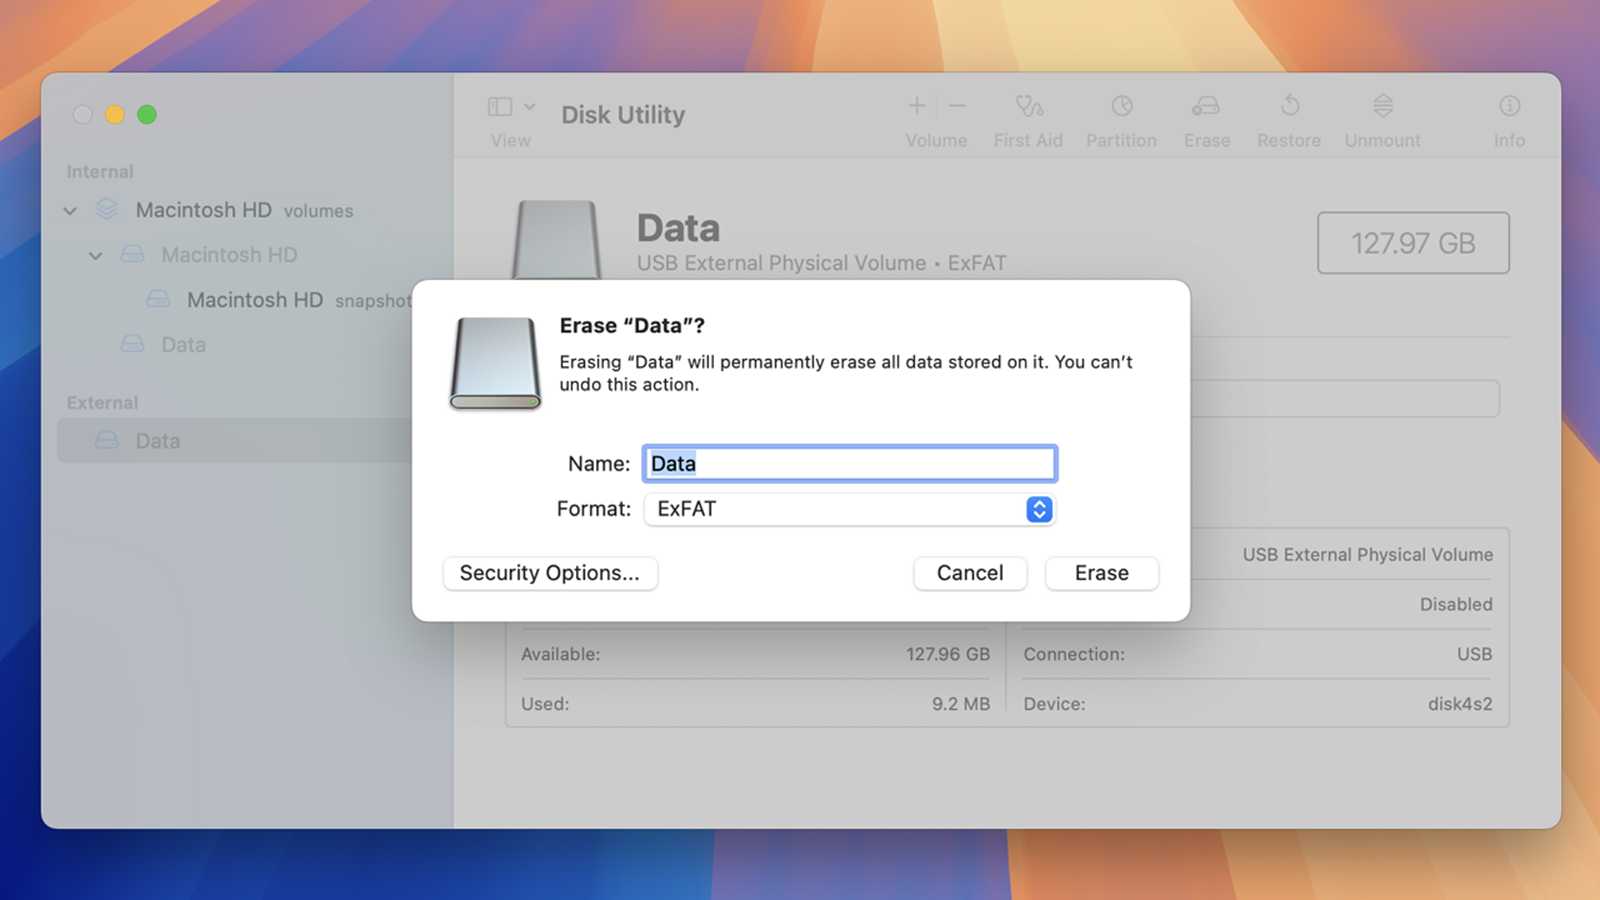
Fix 4. Format the not readable disk you attached in Disk Utility
If your external disk uses an unsupported file system on a Mac, you’ll need to convert the file system to one that is supported. You can easily do this in Mac Disk Utility, and we’ll also provide a formatted disk recovery solution later.
How to convert file system in Disk Utility
Notice: Be careful when applying this method. After formatting the disk, all the data will be removed.
Step 1. Access Disk Utility using Spotlight.
Step 2. Choose the target disk and select Erase.
Step 3. Select a file system that macOS can read, and click the Erase button.
EaseUS
EaseUS
EaseUS
How to recover data from a formatted disk
If you forgot to back up your disk in advance, try professional hard disk recovery software immediately to restore any erased data on your faulty disk.
Finding a trustworthy disk unformat tool is difficult, but we recommend EaseUS Data Recovery Wizard for Mac. This software offers a trial version; you can download it from its official website or the link we offer at the beginning of this article. Do not trust any illegal cracked version.
EaseUS can help you solve a disk that is not recognized or showing up without data loss. It can also help you recover missing data from a SanDisk SD card, WD hard drive, Samsung SSD, or Seagate external hard drive.
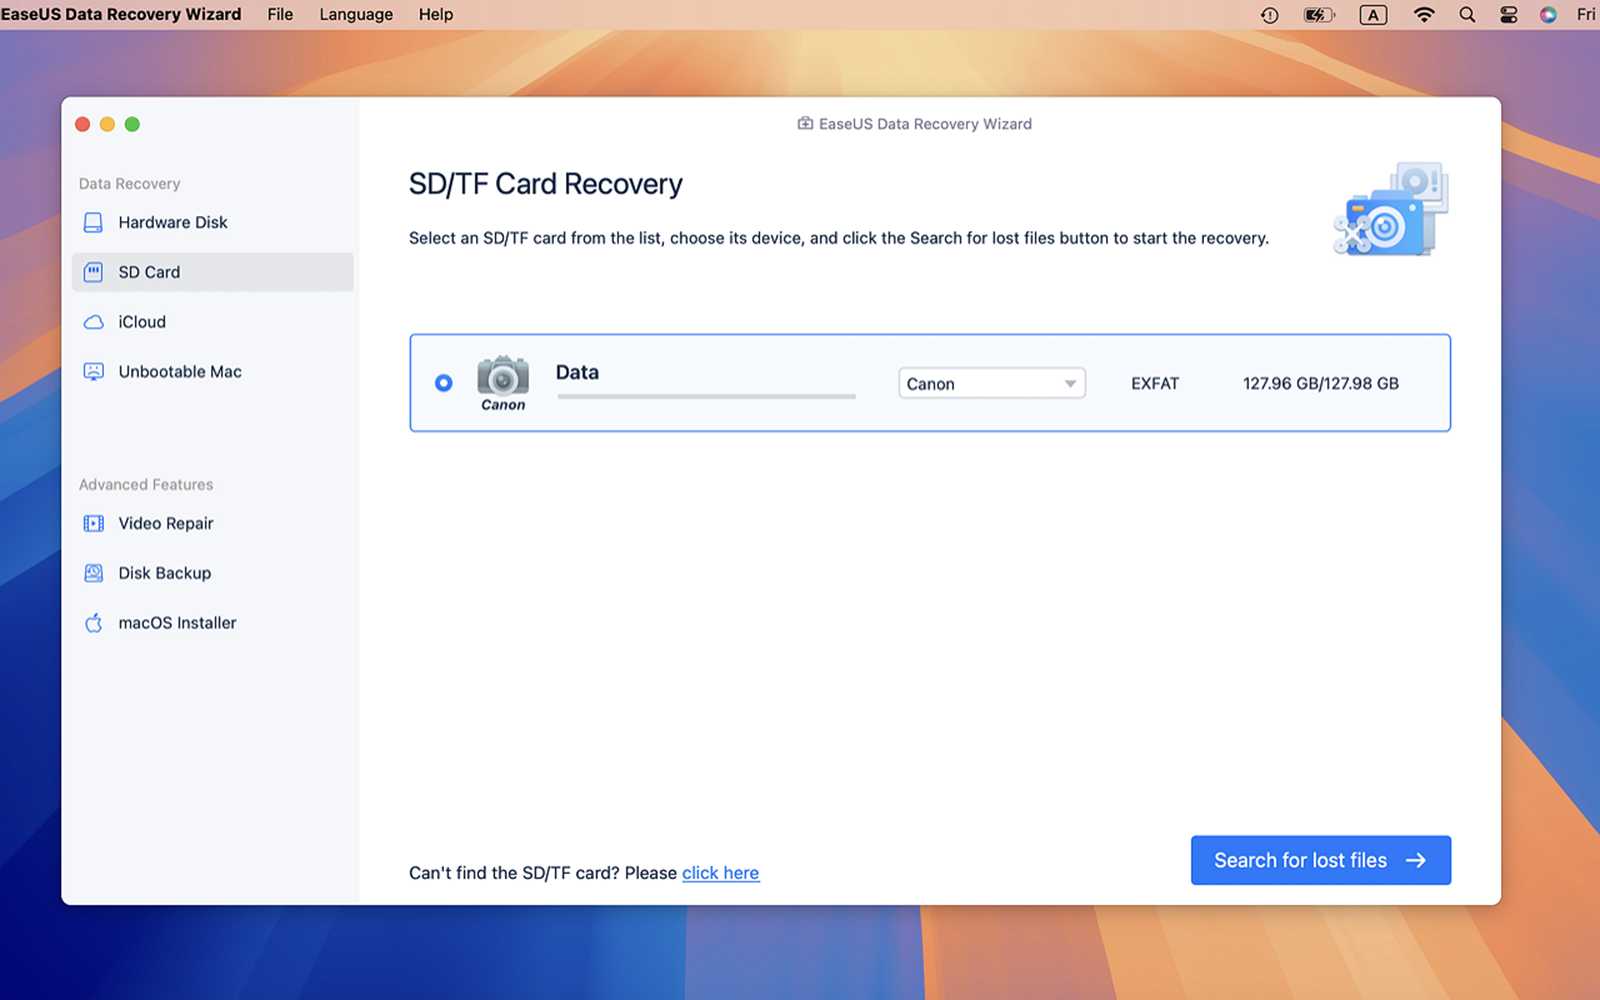
In only three steps, you can get back essential data from a formatted storage device:
Step 1. Click the SD Card tab and choose “Search for lost files” to start disk scanning.
Step 2. You can filter, view, and select recoverable files during the scan process. If your formatted hard drive contains many files, the scan will take longer to complete.
Step 3. Double-click to bring up the preview utility, and you can choose Recover to save a selected file on the formatted drive.
EaseUS
EaseUS
EaseUS
Conclusion
We hope you have gathered enough information to solve the “The disk you attached was not readable by this computer” error message. If your important files are stored on this unreadable disk and you choose to format the disk to fix the problem, remember to try the EaseUS recovery tool as soon as possible to restore your lost files.
Source : Macworld

